
The Complete Guide to Cleaning an Oven
 Cleaning an oven is not usually seen as a particularly fun task, but it's more manageable if it's done regularly and in line with your normal oven usage. You might need to clean your oven anywhere from once a month to once annually, depending on how often you use it, what you use it for, and how dirty it tends to get when it's being used.
Some people never clean their oven, or only very rarely clean it. Failure to take good care of your oven could lead to premature decline of the appliance, or worse, a house fire. Whether you use your oven just occasionally or every day of the week, using good oven maintenance can extend the service life of your appliance. The following tips will help you develop an oven care routine that will make using your oven a safer and more satisfying experience overall.
Always check the owner's manual before using certain cleaning products or removing any pieces from your oven. Failure to consult with your manual or follow manufacturer instructions could void your product warranty. If you no longer have access to your oven's owner's manual, check online. Look up your oven make and model in a search engine. Many manufacturers post each product's owner's manual in PDF format on their company website.
Table of Contents
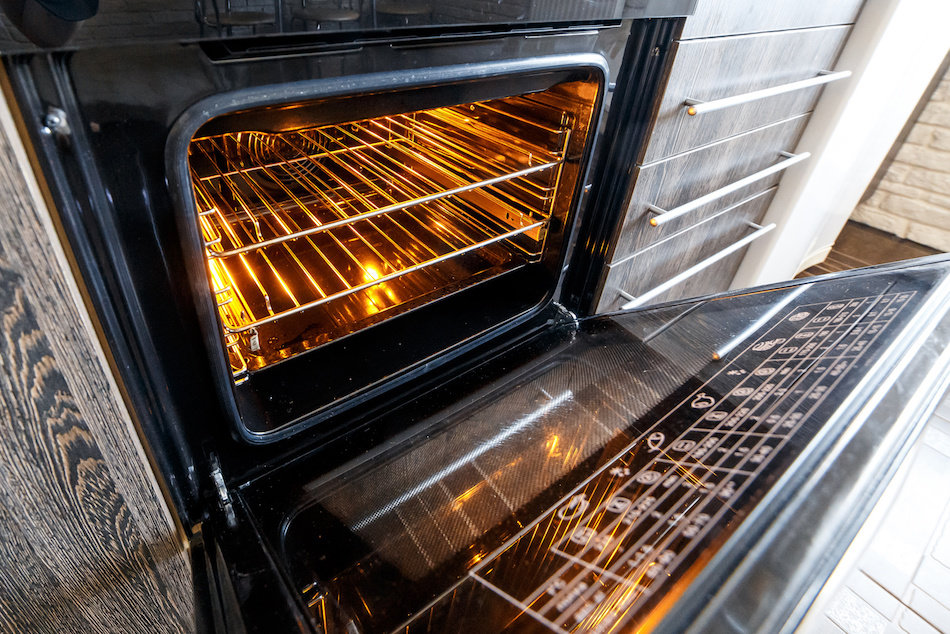
Why Clean Your Oven
Keeping your oven clean is a good idea because it protects you, your property and your family. If you're planning to list your home on the Edmonton MLS, a dirty or broken oven could be a bit of a distraction for buyers. Failure to clean your oven could ultimately break the device, which could create a "range" of problems. But more seriously, here's what you need to know.
Oven Efficiency
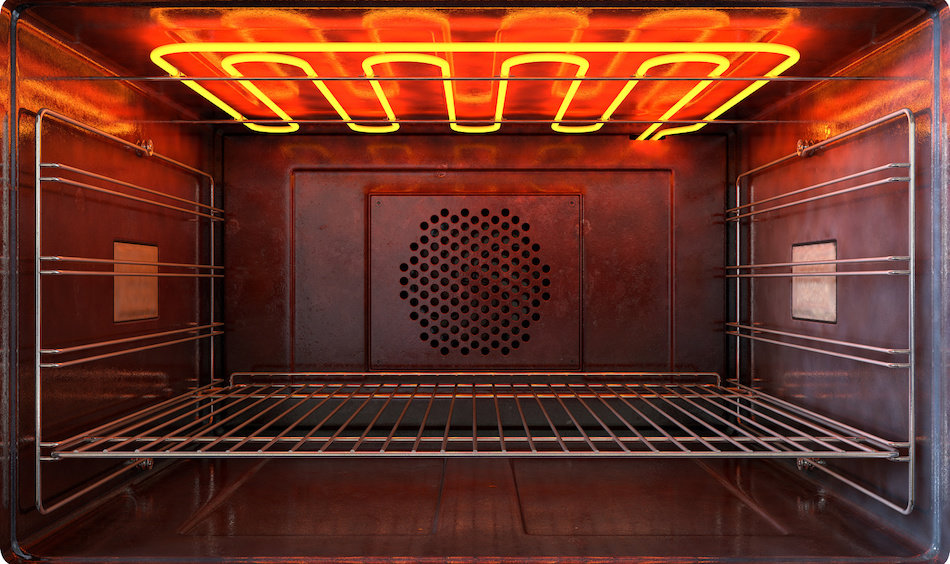
Your oven is designed to heat food evenly and efficiently. A coating of grime and grease, especially on your oven's heating elements, could prevent your oven from functioning efficiently and safely. When this happens, the oven may take much longer to reach its maximum temperature. This causes the oven to work harder and longer just to do its job.
Bacteria
If your food is not cooking at a high enough temperature for long enough, this means that the bacteria in your food is not being killed by the cooking process. Foodborne pathogens can cause serious bodily damages and could even result in death, depending on what's being cooked, what kind of bacteria is left in the food, and the overall health of the person consuming the food.
Food Taste and Quality
Even if bacteria in the food is not a problem, the taste of the food could still suffer. Food needs to be prepared at a proper temperature and for the recommended length of time in order to be cooked fully. If the food is not finished cooking when it is removed from the oven, its flavor or texture could be negatively impacted. Not to mention, burnt on food and grease from previous meals can smoke, causing that smell to leach into foods and affect their taste.
Fire Hazard
When the inside of the oven is covered in crust or grime, it's likely to burn up as it's heated. Typically, when something burns up in an oven, it produces smoke that fills the kitchen, creating an unpleasant smell. This can also cause smoke alarms to go off, which is an inconvenience. And occasionally, under the right circumstances, food that burns up in the oven can even catch fire. Needless to say, you wouldn't want to burn down your townhome for sale because of a dirty oven.
Longer Oven Life
As already mentioned, an oven that is very dirty on the inside will run inefficiently, which places undue burden on the appliance. This reduces its service life. You can keep your oven functioning better for longer if it is clean.
General Cleaning Tips
Before you can learn specific cleaning methods, first learn the ground rules of good oven cleaning.
Start with the Least Harsh Cleaning Method
Harsh cleaning methods can damage your oven, so you should never use them if they're not necessary. When choosing a cleaning method for your oven, start with the least harsh cleaning product or method available to you. If that method doesn't work, try the next one, and so on.
Don't Mix Chemicals
Different cleaning products can react explosively with one another. Bleach and ammonia are an excellent example of two cleaning products that should never be mixed. When they are combined, they create chloramines, a toxic gas that can cause respiratory problems and other symptoms.
Work in a Well-Ventilated Area
Even the mildest oven cleaner must be a powerful product to remove the baked-on, crusty mess that gets stuck to the inside of most ovens. Often, these cleaning products release harsh fumes that can irritate the lungs and make breathing difficult. Never clean an oven in a room that is not well-ventilated. Turn on the vent above the oven and open the windows in the room to keep the air inside safe for breathing.
Soak the Oven
Most oven cleaning products need time to soak into the grime before they can be fully effective. Apply cleaning products to the dirty surfaces and allow them to soak before wiping them away. This gives the cleaning products time to work properly and means less elbow grease for you.
Don't Use Chemicals in Self-Cleaning Ovens
Some ovens have a self-cleaning feature, your manual can help you determine what kind of oven you have. Do not use cleaning products in a self-cleaning oven before using the self-cleaning feature.
Use Different Methods for Cleaning Each Component
Different parts of the oven may be cleaned using separate techniques depending on what's being cleaned, what the surface is made from as well as other factors. Experiment with different cleaning products and methods. When you find a type of cleaning product or technique that works for a portion of your oven, make a note and use that technique again as needed.
Self Cleaning
If you're going to use it, a self-cleaning cycle is the place to start when cleaning your oven. Remove everything from inside your oven, wipe or vacuum away any large debris, then run the self-cleaning feature.
Self-cleaning functions vary from one oven to another, so follow the manufacturer's instructions carefully. Failure to follow instructions could result in a fire or damage to your oven, so get the correct information for your appliance before using the self-cleaning setting.
The Process
During the self-cleaning process, the oven heats up to a high enough temperature that all food and grime inside the oven turns to ash. Once the self-cleaning cycle is finished, the ash can be easily wiped away.
Self-cleaning temperatures can vary, but some ovens go up to as high as 900 °F. Cycle times vary as well, depending on the make and model of the oven. Some ovens can take up to 5 hours to complete a cycle, depending on how dirty it is.
If this is your preferred method, use this feature on a regular basis. Do not allow grease and grime to become too thick before beginning a cycle, as this could cause your oven to start smoking. Some people also caution oven users from beginning a self-cleaning cycle before the holidays or before an important date when the oven will be needed (like a birthday). Self-cleaning cycles require a lot of power and can be hard on an oven. If the oven should break during a self-cleaning cycle, it could take several weeks to get an oven repair person to your home or to replace the oven.
Prep the Oven
Before starting the self-cleaning cycle, empty the oven of all pots, pans, pieces of tin foil and large globs of food. Remove the racks as well, unless the manufacturer's instructions say you can leave them inside.
Run the Self-Clean Cycle
Every oven is different, so follow the instructions in your owner's manual to run the self-clean cycle. The oven door will lock while the self-cleaning cycle is running, so you won't be able to open your appliance while the process is taking place. So check, then double check that everything is out before hitting that start button.
Clean After the Cycle Ends
Use a dish cloth, paper towel, or a rag to wipe the soot away. If you have a vacuum with an extension hose, that can be used as well.
The Concerns
Although self-cleaning ovens have been around for a long time (since the 1960's), and most modern ovens come with self-cleaning cycle, some people still have concerns over the safety of the process.
Hard On Oven
Heating up to 900 °F (482.22 °C) is no small feat. Although your oven should be designed to withstand the heat and energy required to complete a self-cleaning cycle, some say that self-cleaning can cause your oven to blow a fuse. Others say that self-cleaning has been known to cause the glass door to shatter.
How often this happens is hard to say. If your oven door has sustained damage, or if the oven is very old, the likelihood that the oven will break during the self-cleaning cycle may be increased. Keep your oven in good condition, get a tune up if necessary, and never leave the house during the self-cleaning cycle.
Health Risks
Self-cleaning creates fumes that can cause your home to smell. In fact, the fumes from self-cleaning can be detrimental or even deadly for pets. Birds in particular are sensitive to the fumes released during the process.
Additionally, oven doors can become quite hot while the process is taking place. Anyone who comes into contact with the door may sustain a burn.
Tips
Use the self-cleaning feature when the oven is "moderately" clean. Waiting until the oven is a filthy mess could cause a fire, or a smokey, smelly mess in your home.
Keep the vent open. Most likely, your oven has a vent that leads to the outside. This vent is critical in the functioning of your oven. Keep this vent unblocked. If you've recently done some DIY roof work, double check the vent to ensure that the path from your oven to the outside is clear.
Don't leave anything inside. Leaving objects inside your oven during self-cleaning could result in a fire. Again, check and double check your oven before running the self-cleaning cycle to ensure that there's nothing inside to remove.
Do's and Don'ts
- Do stay at home. Just as you wouldn't bake anything and run to the grocery store, you should never run the self-cleaning feature when you're not at home.
- Do open windows. Failure to ventilate could leave an odor in your home, and can also reduce your home's indoor air quality.
- Do have fans ready. Keep box fans near the windows just in case you need to ventilate quickly.
- Don't run cycle overnight. Stay alert and aware of what your oven is doing during the self-cleaning cycle, so you can take action if something goes awry.
- Don't use chemicals to clean. Self-cleaning requires no use of chemicals prior to running the cycle. Use of chemicals could cause fumes or a fire.
- Don't allow others into the kitchen while self-cleaning is taking place. To avoid burns and other injuries, limit access to the kitchen during the self-cleaning process.
Potential Alternative: Steam Cleaning
Some ovens now have a "steam cleaning" feature that makes it easier to clean your oven with a rag or sponge. Steam cleaning is done at a lower heat and takes less time than the standard self-cleaning cycle. Even if your oven doesn't have a steam clean setting, you can simulate a cycle with the right tools.
Steam cleaning processes may vary depending on the oven, but most ovens require the user to pour one cup of water in the bottom of the oven, close the door, and turn to the steam clean setting.
Since steam cleaning takes place at a lower temperature, your oven will not lock while the cleaning is taking place. As a bonus, you can leave the rack inside. Some manufacturers even allow pans to remain inside the oven during steam cleaning, but check with the owner's manual to see if this is safe for your oven. This may take a moment, so if you're planning on showing your Edmonton home for sale soon, make sure the timing checks out.
To simulate steam cleaning:
- Warm the oven to 450 °F (232.22 °C).
- Place a cookie sheet filled with water inside the oven.
- Leave the cookie sheet inside the oven for 20 to 60 minutes.
- Remove the cookie sheet.
- Allow the oven to cool enough that you can clean it safely.
- Wipe away condensation and loosened debris with a rag.
- Scrub down difficult to clean areas with paste made from vinegar and baking soda.
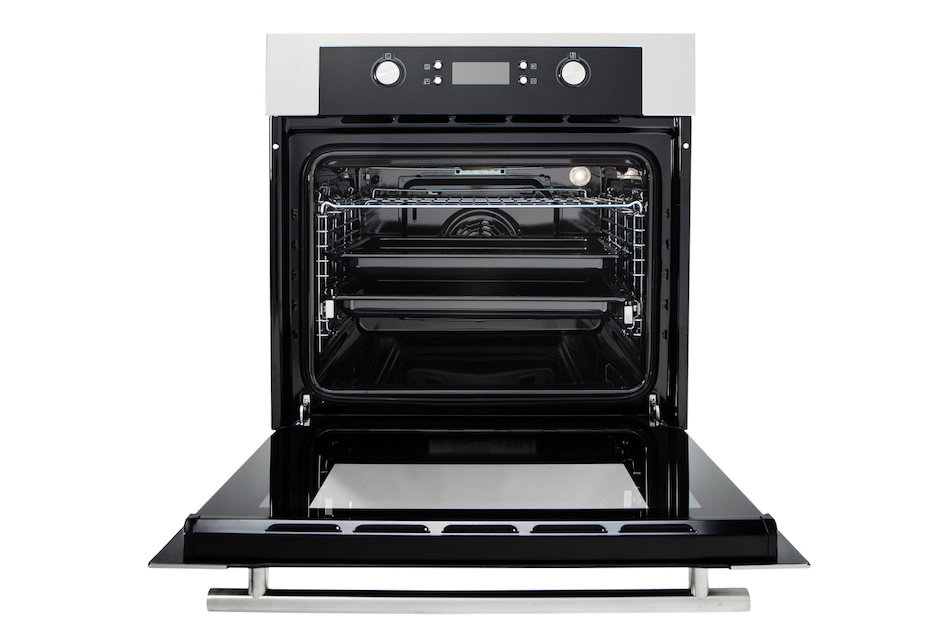
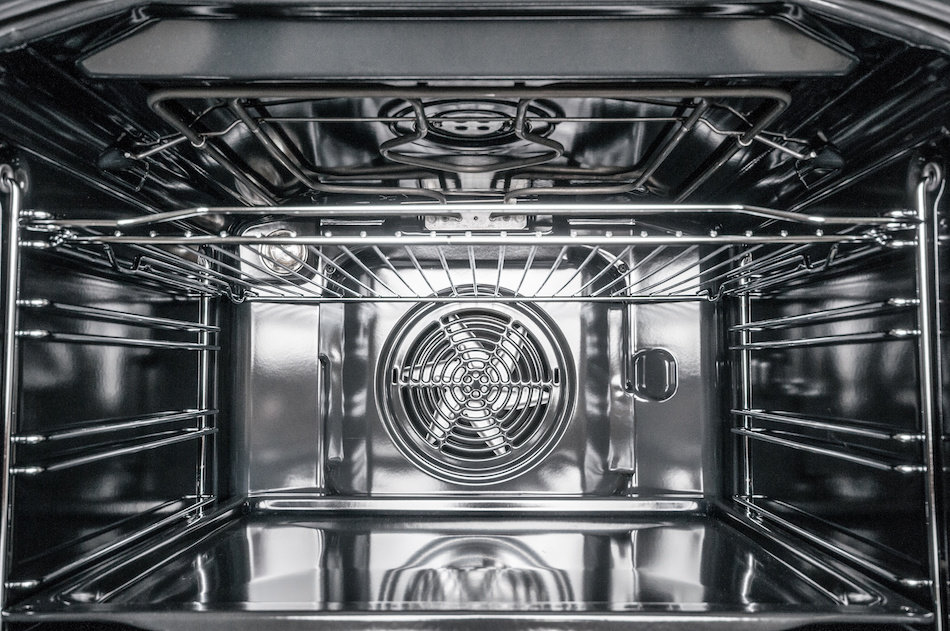
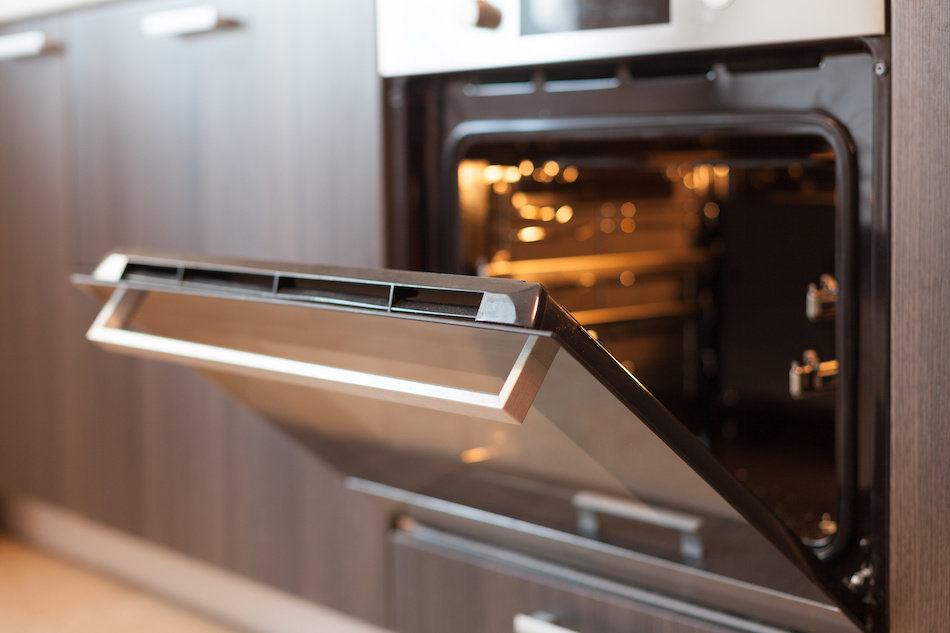
Inside the Oven
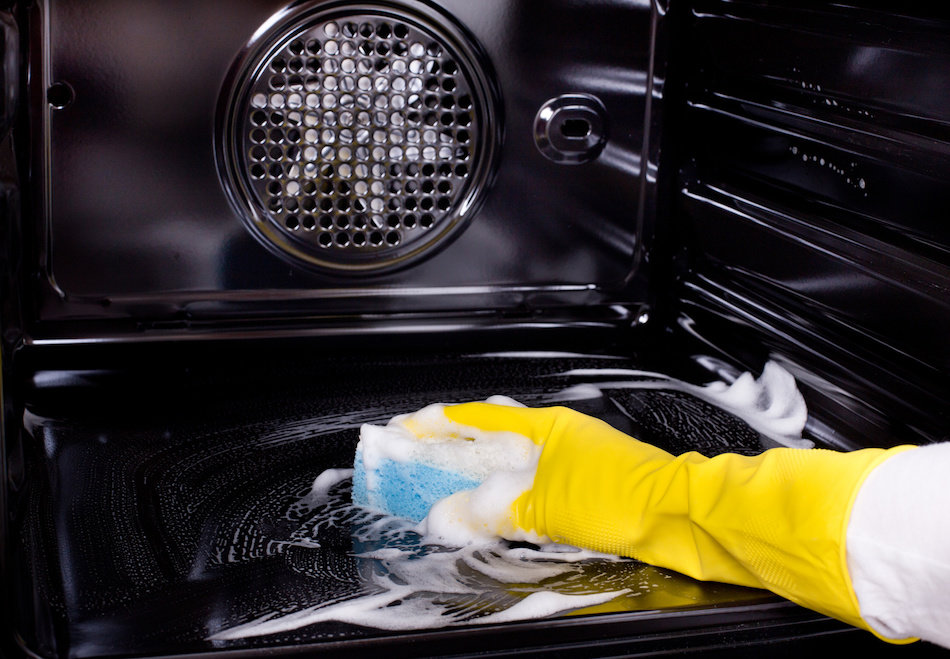
If you've just finished the self-cleaning process, your oven is likely clean and should require little or no additional cleaning. However, if you prefer to clean your oven without the self-cleaning or steam cleaning feature, start your cleaning process by removing any large or loose debris. Remove any pots and pans from the oven. Remove racks as well, and clean them separately.
Once you've completed these preliminary steps, it's time to get into the cleaning process itself. The method you use to clean your oven will depend largely on the cleaning products you have on hand, how dirty your oven is and how long it's been since your oven was cleaned. You may have to try several methods before you find what works for you.
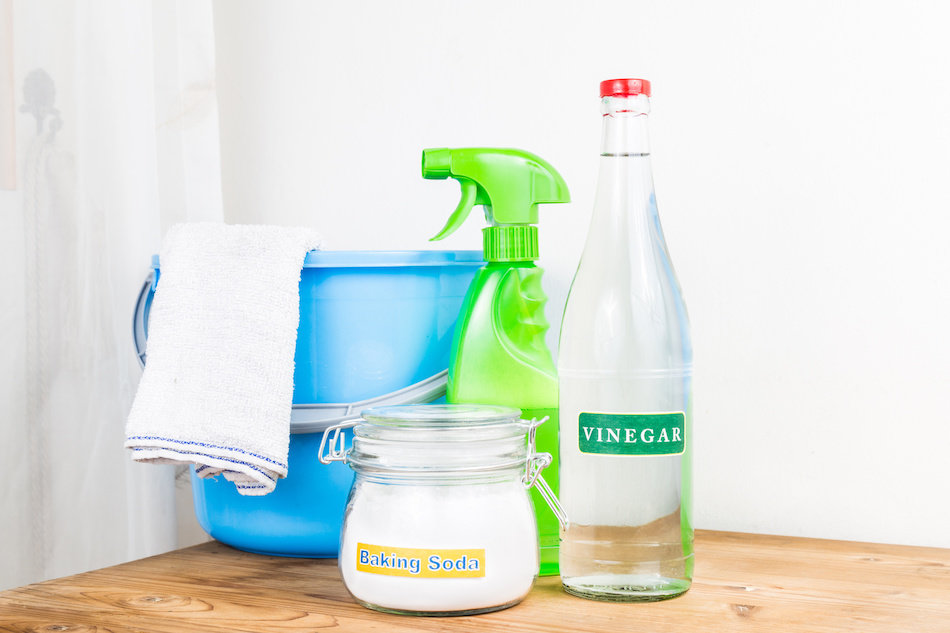
DIY Cleaners
Many of the products you keep in your kitchen for baking and cooking can be used to clean your oven. These DIY cleaners cost less and are safer as well as cheaper than many commercial cleaning products sold in stores. As a plus, you can add essential oils to your DIY cleaning products to produce a desired scent. Also, as with any cleaners, keep your DIY mixtures in a safe and secured place, making sure to properly label what's in every bottle.
Below are some of the most common ingredients used in DIY oven cleaning:
- Vinegar. This slightly acidic cleaner can be used to break down baked on grime.
- Baking soda. This baking product provides gentle scrubbing action, and is also effective on grease.
- Lemon juice and whole lemons. Like vinegar, lemon juice is slightly acidic and can be helpful for scrubbing away layers of old food.
Benefits of DIY Cleaners
In addition to the reduced cost and household safety issues, there are other reasons to use DIY cleaners.
- Better smell, no harsh fumes.
- Better for indoor air quality.
- Eco-friendly.
- Safe for children and pets to be nearby.
DIY Oven Cleaning Method #1
This first DIY cleaning method wipes away tough, baked on food clumps and grease spots. This method requires the oven to sit for a while as the paste takes effect. While it's sitting, you can do other projects around the house.
Required Materials:
- Baking soda
- Water
- Paper towel or brush
- Vinegar
- Spray bottle
- Sponge
Process:
- Mix baking soda and water until it forms a smooth, non-runny paste.
- Use a paper towel or a brush to paint the paste on the inside of the oven.
- Let the mixture sit.
- Mix equal parts vinegar and water inside the spray bottle.
- Spray the oven with the mixture.
- Use a sponge to wipe the oven clean.
DIY Oven Cleaning Method #2
This process is a little more labor intensive but also can be accomplished a little more quickly. This is an excellent method if you want to do a quick cleaning before the holidays or before a big meal.
Required Materials:
- Baking soda
- Vinegar
- Dish soap
- Spray bottle
- Sponge
Process:
- Mix baking soda with a combination of vinegar and dish soap.
- Pour vinegar and soap mixture into a spray bottle.
- Spray liquid inside the oven, concentrating on parts of the oven that are most dirty.
- Sprinkle baking soda over the liquid.
- Allow the liquid and baking soda mixture to sit inside the oven for a while.
- Scrub the oven clean.
- Repeat steps 3 through 6 as needed.
DIY Oven Cleaning Method #3
This DIY cleaning method requires use of ammonia, which can be toxic for people. Although ammonia is a natural ingredient, it's important to read and follow all manufacturer instructions.
Required Materials:
- Ammonia
- Baking dish
- Boiling water
- Pot
- Dish soap
- Rubber gloves
- Two sponges
Process:
- Preheat oven to 150 °Fahrenheit (65.56 °C).
- Boil water while oven is pre-heating.
- Place a baking dish with 1 cup ammonia on the top rack.
- Place boiling water into pot on bottom rack.
- Close the door.
- Turn off oven.
- Allow the oven to sit overnight.
- Open the oven and allow it to air out for 15 minutes.
- Open window and turn on oven vent.
- Mix the ammonia with one teaspoon of dish soap.
- Put on rubber gloves.
- Use sponge to scrub the inside of the oven, using amonia mixture where needed.
- Rinse by scrubbing with a sponge dampened with water.
DIY Oven Cleaning Method #4
This method smells great because it uses fresh lemons and lemon juice. It's very similar to steam cleaning, and it's also refreshing!
Required Materials:
- Baking dish
- Water
- 2 Lemons
- Sponge
- Towel
Process:
-
Preheat the oven to 250 °F.
-
Fill a baking dish 1/3 of the way with water.
-
Add lemon juice and skins from two lemons to the water.
-
Put the mixture into the oven and bake for 30 minutes.
-
Allow the oven to cool for one hour.
-
Wipe the oven down with a sponge dampened with the lemon water.
-
Wipe the oven dry with a towel.
Cleaning Products
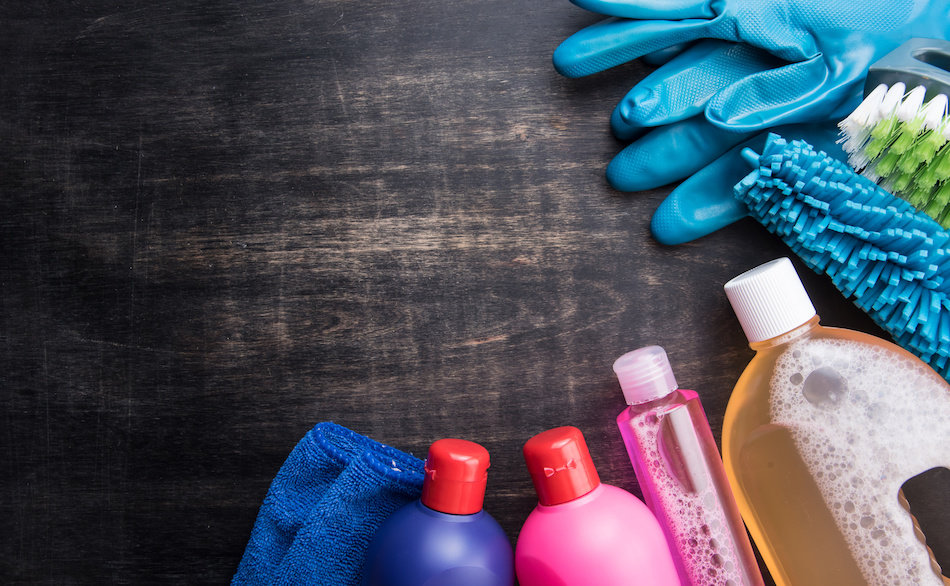
Over the counter oven cleaners are very powerful, efficient, and effective. Many cleaning products can be hazardous if they come into contact with skin or eyes. None of them should ever be swallowed. Store your over the counter cleaning options in a safe and secure place, and teach your children about the dangers of touching cleaning products. Secure the lids to your oven cleaning products when you are done using them.
Best Products to Use
- Method Heavy Duty Kitchen Degreaser: This product is made from plant-based products, so as oven cleaners go, it's relatively safe. It also smells great!
- Easy-Off: This classic oven cleaning product is fume-free and also relatively safe, but still powerful enough to remove years of caked on grease.
- Mr. Clean Magic Eraser: This simple and safe tool can clear away hard to scrape off food bits, but this product should never be used on non-stick surfaces.
Best Method
The most common (and effective) method for using a purchased cleaner is to spray or apply the product, allow it ample time to soak into the grime, then wipe it away with a sponge or rag.
Some tips:
- Wear gloves.
- Ventilate the room well when cleaning.
- Keep your children away from the cleaning product.
- Read the instructions and warnings before using the cleaning product.
- Look on the label for the soak time, as this can vary from one product and another.
Other Cleaning Tips
The folowing cleaning tips make cleaning the inside of your oven safer and easier for everyone, especially you!
Turn off the pilot light before cleaning. The instructions for turning off the pilot light can be found in your oven owner's manual. This step won't apply if you have an electric oven.
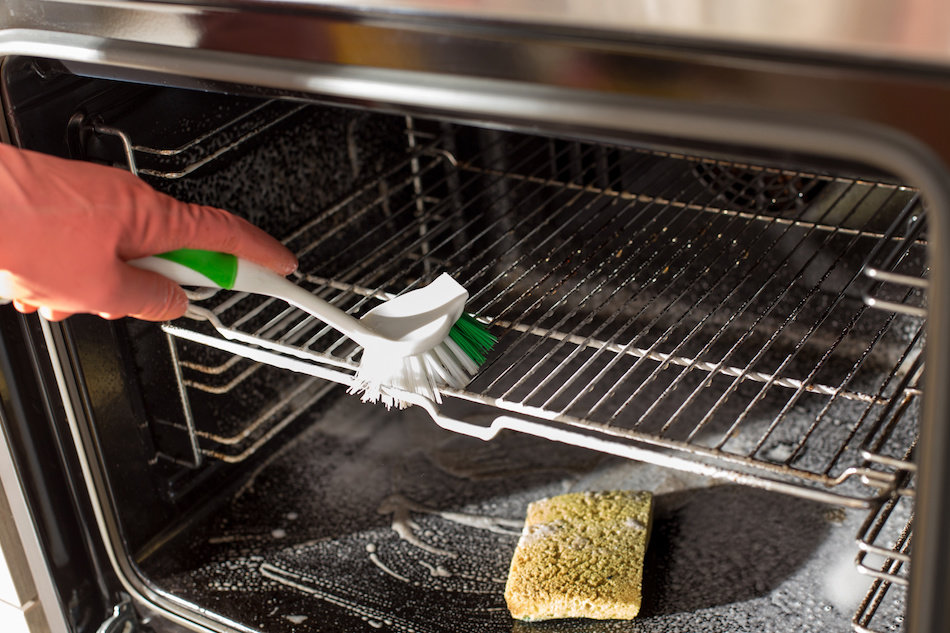
Use the right tools. Use a plastic or silicone spatula to scrape away debris after allowing the cleaner to soak. Use an old toothbrush to scrape little corners and crevices in the oven. Once a spatula or toothbrush has been used to clean your oven, be sure designate that utensil for cleaning purposes only.
Remove loose debris before beginning to clean. It's easier if you remove loose debris after every use of the oven.
Scrub in circular motions. This helps you reach a larger surface area when scrubbing.
Steam your oven regularly. Steam cleaning is safe, effective, and prevents dirt and grime from building up inside your oven. If your oven doesn't have a built-in steam clean cycle, use DIY cleaning method #4 to achieve the same results.
Use oven mats. Grill mats are much easier to clean than the oven itself. Place them in the bottom of your oven, and clean them occasionally when they need it. Read your owner's manual before putting anything on the bottom of your oven, because some manufacturers may prohibit the use of a mat in the bottom of the appliance.
Keep useful products on hand. There are a variety of different products that can come in handy when cleaning an oven. Keep them all on hand so you'll have what you need when you need it. For example:
- Microfiber cloth
- Rubber gloves
- Face mask
- Sponges
- Paper towels
- Paintbrush (for spreading paste)
- Toothbrush
Do's and Don'ts
- Do use rubber gloves and a mask when working with chemicals.
- Do open windows and turn on your oven to maximize ventilation in your kitchen.
- Do turn on fans in the windows to help circulate air.
- Do keep pets and children out of the kitchen while cleaning.
- Do follow the cleaning instructions that come with the oven and cleaning products.
- Do clean regularly to prevent buildup from becoming unmanageable.
- Don't get oven cleaning products on your countertops.
- Don't put chemicals in the oven before using the self-clean feature.
- Don't use foil to protect the bottom of your oven.
- Don't assume that all parts of the oven are cleanable.
Cleaning Oven Racks
Oven racks and broiler pans can get just as dirty as the rest of the oven, but they often need to be cleaned separately, using different methods.
Most oven manufacturers recommend removing racks and broiler pans before performing the self-clean function. Racks and broiler pans are usually removed from the oven during cleanings with purchased and DIY products as well. In general, the only time the racks stay in the oven during cleaning is during steaming.
Before getting started with any of the methods or cleaning products below, remove any loose pieces from the rack. Use a plastic scraper or a spatula to do the scraping for you.
DIY Cleaners
DIY oven rack cleaners are safer for the household and less expensive. For a fresh scent, add essential oils to your cleaning product. It's also worth noting that food, like pizzas and bread, sometimes touch your oven rack. So using safe, natural cleaners helps to ensure that each rack is safe to touch food.
DIY Rack Cleaning Method #1
This method is easy because your oven racks get clean while you sleep!
Required Materials:
- Dryer sheets
- Dishwashing liquid
- Water
- Bathtub
Process:
- Line the bottom of the bathtub with dryer sheets.
- Place racks in the bathtub.
- Add warm water to the bathtub to cover the oven racks.
- Add 1/2 cup of dishwashing liquid and stir to create bubbles.
- Leave the racks in the warm water overnight.
- Scrub the racks with the dryer sheets, refresing the warm water if needed.
- Remove the oven racks and the dryer sheets from the bathtub.
- Dry the racks and replace in the oven.
DIY Rack Cleaning Method #2
This method also uses your bathtub as a cleaning vessel. Unlike cleaning method #1, this method takes less time and can be finished in an afternoon.
Required Materials:
- Towels
- Boiling water
- 1/2 cup dishwashing detergent
- Sponge or soft scrub brush.
Process:
- Lay towels in the bottom of the bathtub.
- Add racks to the bathtub.
- Add boiling water from the stove and hot water from the faucet to fill the tub until racks are covered.
- Add 1/2 cup of dishwashing detergent to the water.
- Allow the racks to soak for several hours.
- Scrub the racks until they're cleaned.
- Rinse the racks.
- Dry and return to oven.
DIY Rack Cleaning Method #3
This method is very similar to other oven-cleaning methods. Some people prefer this method because it involves no use of the bathtub, so you won't have to clean your bathtub when this method is finished. However, this method does use ammonia, which can be hazardous. Take precautions to ventilate the space, keep children and pets away, and avoid skin contact. Wear gloves during this cleaning procedure.
Required Materials:
- Boiling water
- 1 cup of ammonia
- Sponge
Process:
- Preheat oven to 150 °F (65.56 °C).
- Boil water while oven is pre-heating.
- Place a baking dish with 1 cup ammonia on the top rack.
- Place boiling water into pot on bottom rack.
- Close the door.
- Turn off oven.
- Allow the oven to sit overnight.
- Open the oven and allow it to air out for 15 minutes.
- Open window and turn on oven vent.
- Mix the ammonia with one teaspoon of dish soap.
- Put on rubber gloves.
- Remove the racks.
- Use sponge to scrub the racks.
- Rinse by scrubbing with a sponge dampened with water.
DIY Rack Cleaning Method #4
This method is very similar to the DIY oven steaming method. Using lemons helps ensure that your oven, oven racks and kitchen will smell fresh. Like DIY Rack Cleaning Method #3, this method also does not require you to use a bathtub. If you don't have a bathtub and your oven racks aren't in bad shape, this is an excellent method to use.
Required Materials:
- Baking dish
- Water
- 2 Lemons
- Sponge
- Towel
Process:
- Preheat the oven to 250 °F (121.11 °C).
- Fill a baking dish 1/3 with water.
- Add lemon juice and skins from two lemons to the water.
- Put the mixture into the oven and bake for 30 minutes.
- Allow the oven to cool for one hour.
- Wipe the racks down with a sponge dampened with the lemon water.
- Wipe the racks dry with a towel.
Cleaning Products
Over-the-counter cleaning products are effective and fast-acting. Unlike natural/DIY cleaning products, which are not specifically designed for the purpose of cleaning ovens and oven racks, over-the-counter products are manufactured to cut through grease.
Best products for oven racks include:
- Mr. Clean Magic Eraser: This slightly abrasive product is highly effective product but can only be used sparingly.
- Easy Off: This powerful product is just as effective with oven racks as it is with oven cleaning.
Cleaning Method #1
Most people prefer to keep their over-the-counter oven cleaning products out of the bathtub. That’s why this method is so useful: it’s all done in a garbage bag.
Required Materials:
- Plastic scraper
- Large garbage bag
- Over-the-counter cleaning product
- Sponge
Process:
- Use the plastic scraper to scrape away all loose materials on the oven rack.
- Insert the oven rack into a large garbage bag.
- Spray the over-the-counter cleaning product onto the racks.
- Tie the top of the garbage bag to seal it.
- Lay the garbage bag down somewhere safe, outdoors, not in direct sunlight.
- Leave the racks to soak for the length of time specified on the cleaning product instructions.
- Remove the rack from the bag.
- Use the sponge to scrape away grease on the rack.
- Rinse with a sponge dampened with water or spray down with a water hose.
Note: this method also works with a spray down of ammonia rather than a cleaner. Remember to wear gloves and keep children and pets away when using ammonia.
Cleaning Method #2
If you’re in a pinch and your oven racks will fit in the dishwasher, this is the way to do it. Avoid using abrasive dishwashing detergent.
Required Materials:
- Plastic scraper
- Dishwashing liquid
Process:
- Remove the oven rack from the oven.
- Use a plastic food scraper to scrape away the large and loose debris on the rack.
- Place the rack in the dishwasher.
- Place dishwashing liquid in the holder.
- Run the dishwasher.
- Repeat if needed.
This method does not work especially well if your oven rack has a lot of baked-on grease. This is a good method to use if your racks are not especially dirty. Do this regularly to prevent the grease from building up.
The Glass Door
Self-cleaning cycles will not clean the glass door as effectively as the rest of the oven. This part of your oven may need some individual attention.
Cleaning the glass on the outside is simple enough, but the inside can require harsher cleaning products and more elbow grease. Cleaning the oven glass is important because dirty oven glass can impede your ability to see whatever you're baking and can make your oven look more dirty than it is.
Glass Door Exterior
Like other fixtures in your kitchen, the outside of the glass door can get greasy and sticky. Cleaning the glass door exterior is about as complex as cleaning your cabinets or refrigerator door. With the right materials, you can clean your stove's glass door easily. The trick is to clean the door regularly. The more often you clean it, the easier it will be to remove the grime.
Required Materials:
- Microfiber cloth
- Glass cleaner or vinegar and water
Process:
- Turn off the oven if it's on, and allow it to cool.
- Spray the oven door with glass cleaner or a combination of vinegar and water (equal parts).
- Wipe the oven door with microfiber cloth until it is not sticky and grease-free.
- Repeat as necessary.
DIY Glass Cleaners
Below are some effective and easy recipes for making common cleaning products, made from materials you probably already have in your own home.
Cornstarch Glass Cleaner
This cleaning product contains cornstarch, which is good at loosening the bonds between grease and glass, and can remove stuck-on foods found in the cracks and crevices of your door.
Required Materials:
- 1/4 cup of vinegar
- 1/4 cup of rubbing alcohol
- 2 cups water
- 1 tablespoon cornstarch
Process:
- Combine ingredients.
- Swish together ingredients until cornstarch is dissolved.
- Spray door.
- Wipe away with microfiber cloth.
Rubbing Alcohol and Vinegar
This cleaning product evaporates quickly for a streak-free shine.
Required Materials:
- 1 cup water
- 1 cup rubbing alcohol
- 1 tablespoon vinegar
Process:
- Combine ingredients and spray.
- Wipe away with a microfiber cloth.
Straight Vinegar
Some people use pure vinegar to clean their glass. While the recipe is simple, vinegar alone is not the best glass-cleaning product. Especially when cleaning the glass door of an oven, vinegar doesn't quite have the cleaning power of the above DIY cleaning mixtures.
Glass Cleaner
There are several glass cleaning products on the market. Below are some of the best.
- Method Glass and Surface Cleaner. This product has a good scent and leaves glass reliably shiny, but may not work well if your oven doors have years of caked on grease.
- Windex. This classic glass cleaning product leaves glass streak-free and clean.
- Windex Wipes. This product combines the original Windex with a tough little disposable wipe; this is good if you don't have any sponges on hand.
- Pine-Sol Multi-Purpose Cleaner. This product is an excellent option if your oven door is especially grimy.
Cleaning Glass on the Inside

Cleaning the glass inside the oven door is much more difficult than cleaning the glass on the outside. Especially if you've never or rarely cleaned your oven, the grease and grime on the inside of your oven door could take a lot of effort to remove. Start the cleaning process by using a sponge to remove any obvious pieces of debris.
Steaming the inside of the oven will help with debris on the glass, so if you haven't steamed your oven yet, now is a good time. Use a cleaning product to wipe away the surface-level grease.
DIY Cleaners
The following DIY cleaners can be made from ingredients you likely already keep in your house. They're simple, effective, and inexpensive.
Baking Soda and Water
This cleaning method is very much like other DIY oven cleaning methods. It's effective and produces no harsh fumes.
Required Materials:
- Baking soda
- Water
- Paintbrush
- Sponge
Process:
- Mix baking soda and water together to create a paste.
- Paint the paste on the inside of the oven door with a paintbrush.
- Allow the paste to sit on the oven door for a while.
- Wipe away the paste with a sponge dampened with water.
- Repeat as needed.
Ammonia
Ammonia needs to be used in a well-ventilated space. Open all windows in the kitchen and turn on the vent above the stove before beginning this process. Use gloves when handling ammonia, to avoid skin contact. Keep children and pets out of the room when using this product.
Required Materials:
- Ammonia
- Paper towels
- Sponge
Process:
- Soak paper towels in ammonia.
- Lay the paper towels on the glass.
- Allow the paper towels to sit for at least an hour; you may need to re-wet the paper towels if they begin to dry out.
- Remove the paper towels and wipe away the grime with a damp sponge.
Cleaning Products
Sometimes DIY products don't have the cleaning power you need to get grease off of glass. To get the job done, you may have to opt for a more potent, store-bought, and potentially toxic solution. If you go that route, be sure to read the label.
- Weiman Oven and Grill Cleaner. This product uses grease-cutting foam that works in just minutes.
- Norwex Oven and Grill Cleaner. This product uses enzymes to cut through grease.
Remember that not all cleaning products can be mixed together, so when using commercial cleaning products, use them one at a time. Follow all manufacturer's instructions to avoid burns or toxic exposure, and always wear rubber gloves.
Cleaning Between the Glass
Sometimes, despite your best efforts and expert use of cleaning products, the glass appears to remain dirty because of the grime stuck between the two panes. This is possible to clean, but often more difficult. To get this done, you'll need some tools. You won't be able to clean the space between the glass without removing the door and taking it apart.
Find the owner's manual to your oven, and follow all instructions. Do not take apart the door unless you feel confident you can get it back together safely. If you can't find your owner's manual, look it up online. Most oven manufacturers will publish PDFs of their owner manuals on their websites.
Once the door has been taken apart, you can use nearly any glass-safe cleaning product you're comfortable using. Don't feel like you have to use the cleaning product recommended in this tutorial.
Removing the Door
Check your owner's manual and follow all instructions over the instructions in this tutorial. Make sure that you're not jeopardizing your warranty by taking apart pieces of your oven. A typical door removal process goes like this:
- Place a towel or sheet on the ground beneath the door.
- Open the door fully.
- Pull the hinge locks, located in the lower corners.
- Firmly grasp both sides of the door at the top.
- Close the door until it reaches the removal position.
- Lift the door up and away from the oven. You may need someone to help you with this step to avoid dropping the door, it may be surprisingly heavy.
- Lay the door down on the ground, onto the old towel or sheet.
- Separate panes by removing the screws on top with a screw driver.
Again, be careful and use caution as you lift the door, as it may be quite heavy.
Separate the Panes
Some people prefer to leave the door attached and separate the panes while the door is open in mid-air. On some models, this may be possible but not necessarily advised.
To do this, locate the two screws at the top edge of the door. Use a screw driver to remove the screws. Separate one side of the door from the other slowly, as the bottom pane of glass may drop and shatter suddenly. Once the 2 sides are separated spray and clean with glass cleaner of choice, then replace the 2 sides and re-assemble the door.
"Hack" Route
On some ovens, the space between the glass can be accessed from the bottom. Open the drawer under the oven and insert a long metal skewer with a wet paper towel stuck to the end into the gap on the bottom edge of the door. Tape or tie the paper towel to the skewer to ensure that it will remain attached to the skewer as long as it is in the door. Swipe the paper towel along the glass to clean it, then remove the skewer from the door when you're done.
Tips:
- Take care to avoid scratching the glass with your metal skewer or instrument of choice.
- Attach the rag or paper towel to the skewer firmly, or it may come off and be stuck inside the door.
- Not all doors have a gap that will work for this process; if yours does not, you will need to remove or open the door as described above.
Other Cleaning Tips
Read all paperwork and manuals from your product manufacturer before cleaning the glass, removing the door, opening the door, or doing anything else that could potentially cause damage to your oven. Some tasks can void your warranty, but this information will be addressed in the oven documentation.
You can use a razor to remove very stubborn spots on the glass. To use a razor, slide the cutting edge of the razor along the glass, at an angle, so that anything on the glass will be scraped up and removed.
Microfiber cloth is generally the most effective type of cloth for removing grime and leaving a streak-free finish. Many other types of cloth will leave fibers behind on the glass.
Oven Exterior
The exterior of the oven is the part everyone sees. Keeping the outside of your oven clean can ensure that your kitchen will look its best for visitors. If you ever want to sell your oven, the cleanliness of the exterior can also affect resale value.
The cleanliness of the oven's exterior can also have an effect your health. If your oven is dirty, then your food could potentially become dirty with old, contaminated food as well.
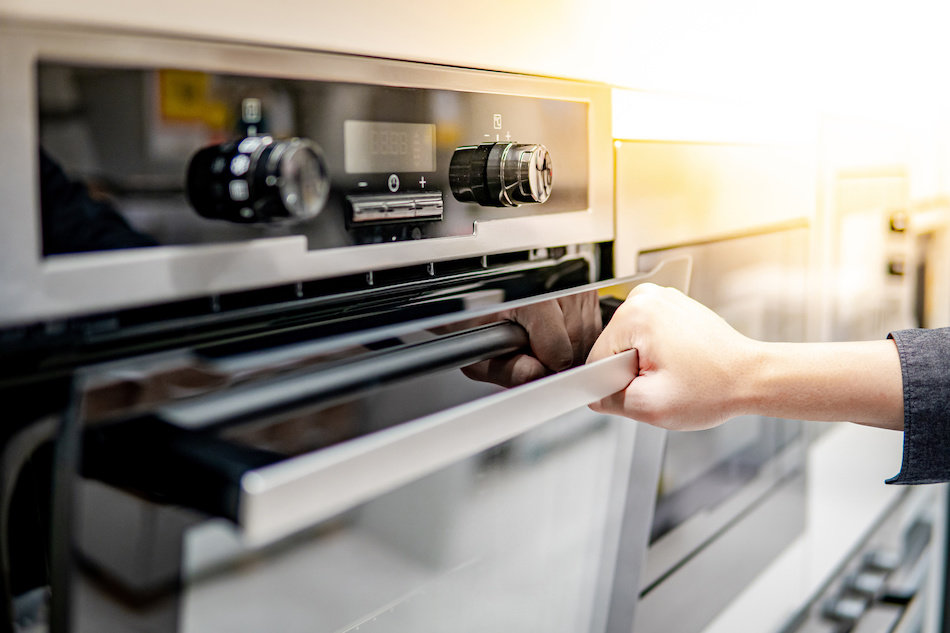
Knobs and Handles
We touch the knobs and handles while cooking, a lot. Keeping the knobs clean can help stop the spread of bacteria.
Most knobs can be easily removed by simply pulling them off. Once off, soak them in a solution of your choice, usually a mild soapy solution will do. Use a small sponge, scrub brush or toothbrush to remove the grime from the cracks and crevices. Dry and replace the knob in the same way you removed it, pushing it back into place.
Many ovens have black knobs, so it can be hard to tell when the knob is dirty. Clean the knobs regularly, even if they appear to be clean.
DIY Cleaners
If you're not sure what type of cleaner or soaking product to use when cleaning your knobs, try a combination of water, vinegar and baking soda. Mix them together in a solution, and leave the knobs to soak.
Other Cleaning Products
If you're inclined to use an over-the-counter product for your knobs and handles, nearly any surface cleaner you prefer to use will be effective against the grease. Soaking it is best, so Pine-Sol's Multi-Purpose cleaner mixed with water is an excellent option. If you're not interested in soaking your knobs, use a Mr. Clean Magic Eraser to get rid of the visible grime. Remember to clean the area behind the knobs on the stove as well before putting them back on.
Other Cleaning Tips
Performing routine cleaning is the most important part of maintaining a clean oven exterior. The longer your oven goes without being cleaned, the more difficult it will be for you to return the oven to its original condition.
- Wipe smudges and splatters as they happen.
- Clean the oven with multi-purpose cleaner after every use.
- Experiment with different cleaning products until you find the right one for you.
- Avoid abrasive cleaners for exterior oven use, as this could scratch the enamel or the stainless steel finish (whichever applies).
Know When to Call a Professional
Cleaning the oven is not for everybody. Some people worry about fire hazards, others worry about working with chemicals. Whether you’re afraid of voiding your own warranty, damaging your oven or even starting a fire, you can avoid problems by calling a professional.
To find out more about hiring a professional oven cleaner, contact local cleaning services to find out their rates and policies. Ask them what they do to avoid voiding oven warranties, and whether they can clean each part of the oven that needs to be cleaned.
Keeping up with oven cleaning can help ensure that your oven will remain in good condition. Your appliance will function better, smell better, look better, and be worth more if it’s properly cleaned.